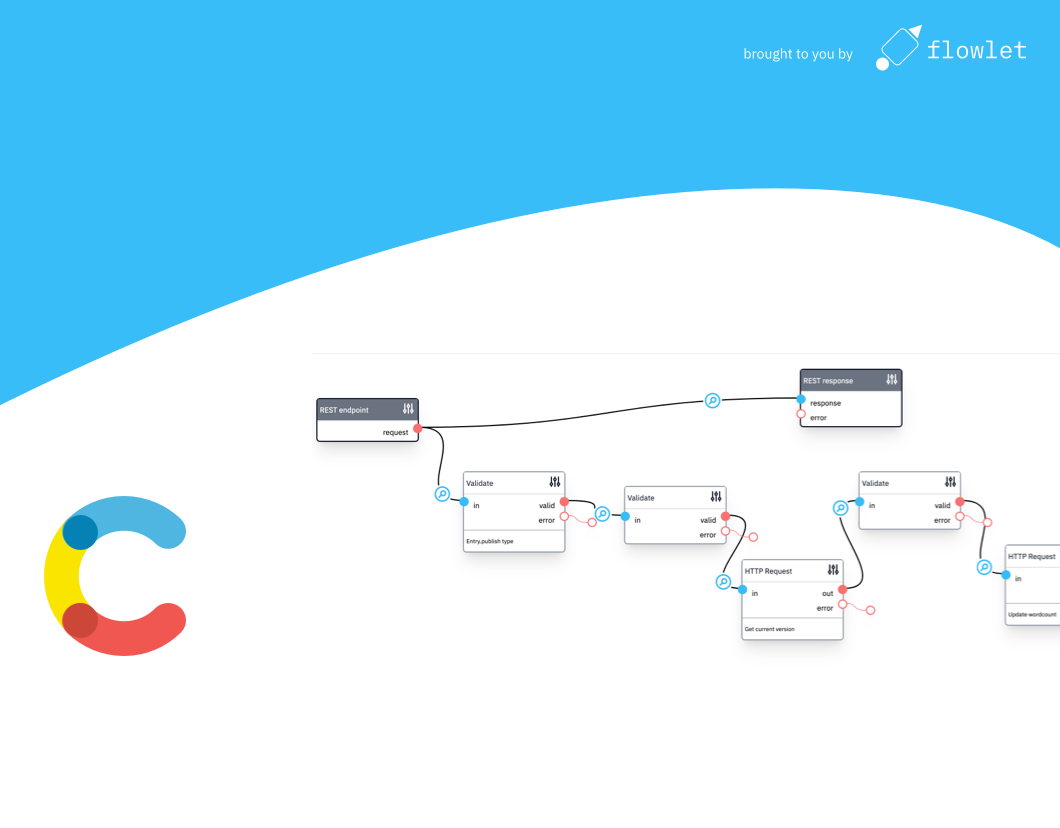
Contentful is a powerful headless CMS that can help you manage your content easily. This week's article is a hands-on guide that shows you how to amend the content in Contentful using their API and webhooks. We'll use a content type "Blog” with a rich text body and a field "word count” that we will update automatically.
When you look at the Contentful developer docs, you'll find multiple APIs. The Delivery API, which you can only use to retrieve published content, is targeted at building websites. You need the Management API to create or update content.
Setting up authentication
An API key is required to make requests to the Management API. These can be created in Contentful under Settings > API Keys. Click the "Generate personal token” button under the "Content management tokens” tab. In the Flowlet settings, create a new secret of the "password” type. Give it the name "contentful” and use the token from Contentful as the password.
Setting up the webhook
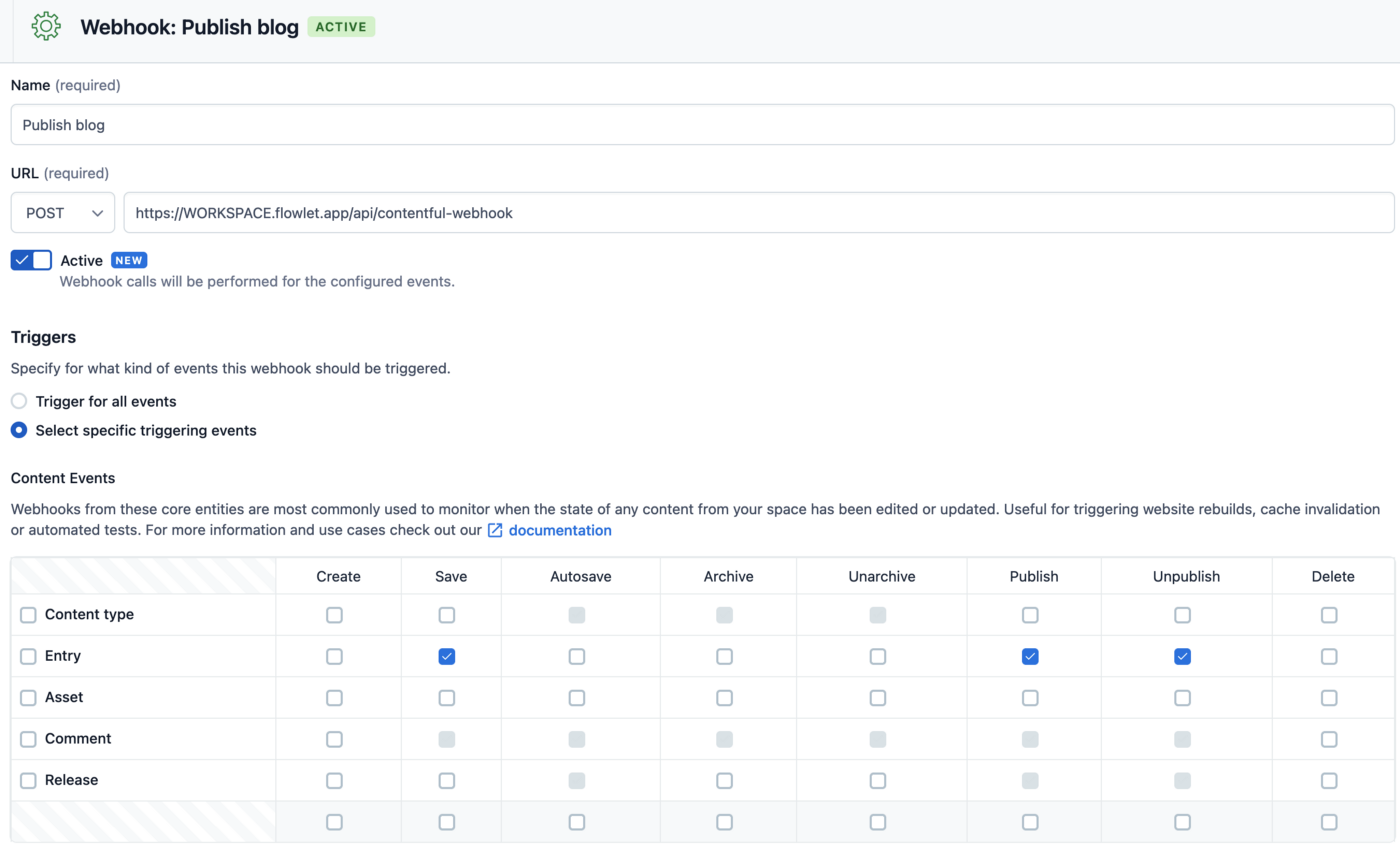
In this example, we will update a field after changing an entry. We can use webhooks to trigger the flow in Flowlet. Under Settings > Webhooks (in Contentful), create a new webhook and set the URL to:
<https://WORKSPACE.flowlet.app/api/contentful-webhook>
Where WORKSPACE is the name of your Flowlet workspace.
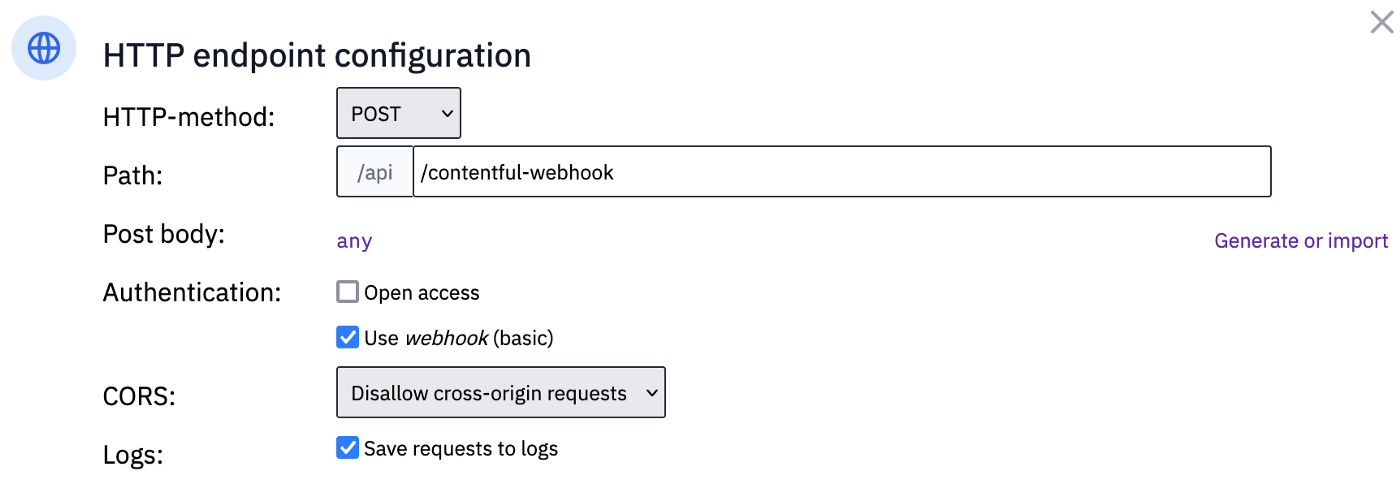
Most webhooks applications will send a signature that you can use to verify that incoming requests are valid. Contentful does not send a signature. Instead, we can set credentials that they will send to our webhook. Click the "Add Basic auth header” link and set a random username and password. Also, create a secret of the "Basic auth” type in Flowlet where you configure the same credentials.
You might enable the webhook for all events, but it creates a lot of noise while testing. It's best to start with a single action only to avoid confusion while testing. In our case, only tick the "publish” action for the blog post. In our use case, there is another crucial reason not to include all operations. We will update the content from our webhook itself. Hence we must ensure that a webhook does not trigger another webhook, and thus an infinite loop of updates.
Lastly, we need to create the HTTP endpoint on the path mentioned above in our Flowlet workspace. In its settings, uncheck "Open access” and check the basic auth we've created.
Updating Entries with the Management API
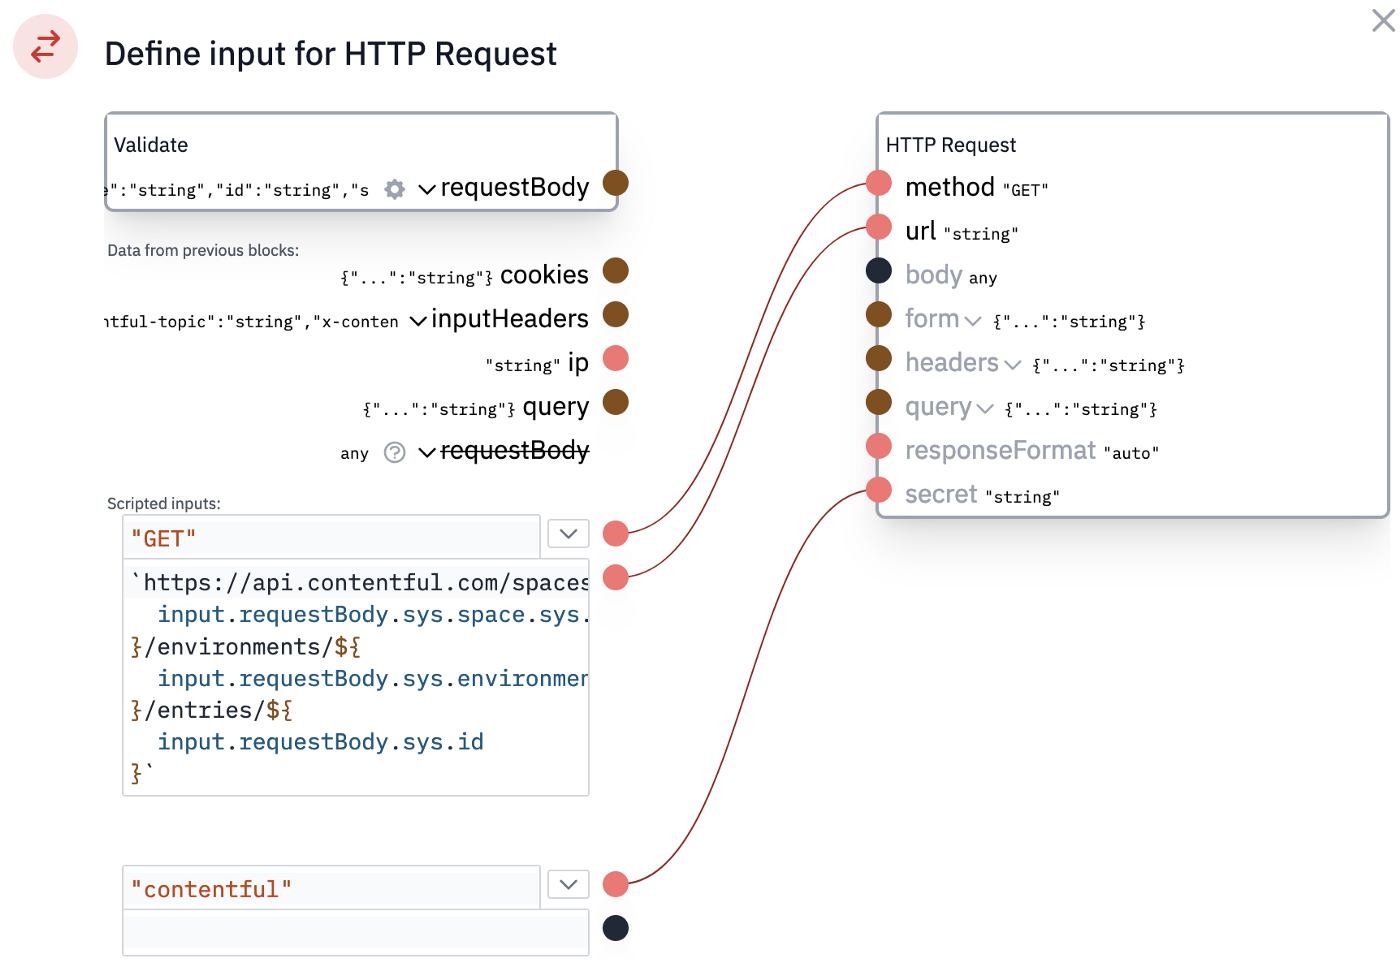
Contentful uses optimistic locking when updating content. In short, it means that you must provide the current version number when updating content, even if you're sure that concurrent updates will not happen. Therefore, to update an entry, you first need to retrieve it from Contentful. This request requires a few identification numbers that we get in the post body. We can use them directly in the mapping dialog's code field to construct the API endpoint as follows:
`<https://api.contentful.com/spaces/${>
  input.requestBody.sys.space.sys.id
}/environments/${
  input.requestBody.sys.environment.sys.id
}/entries/${
  input.requestBody.sys.id
}`
Furthermore, connect the "secret” input for the HTTP request to a code field. A dropdown will appear that lets you select the secret created earlier.
We must validate the output of the request before you can use it in the flow. Because the response format depends on the fields you've defined in Contentful, you should use the request output to generate the validation schema. Open the configuration of the start block and check "Save requests to log”.
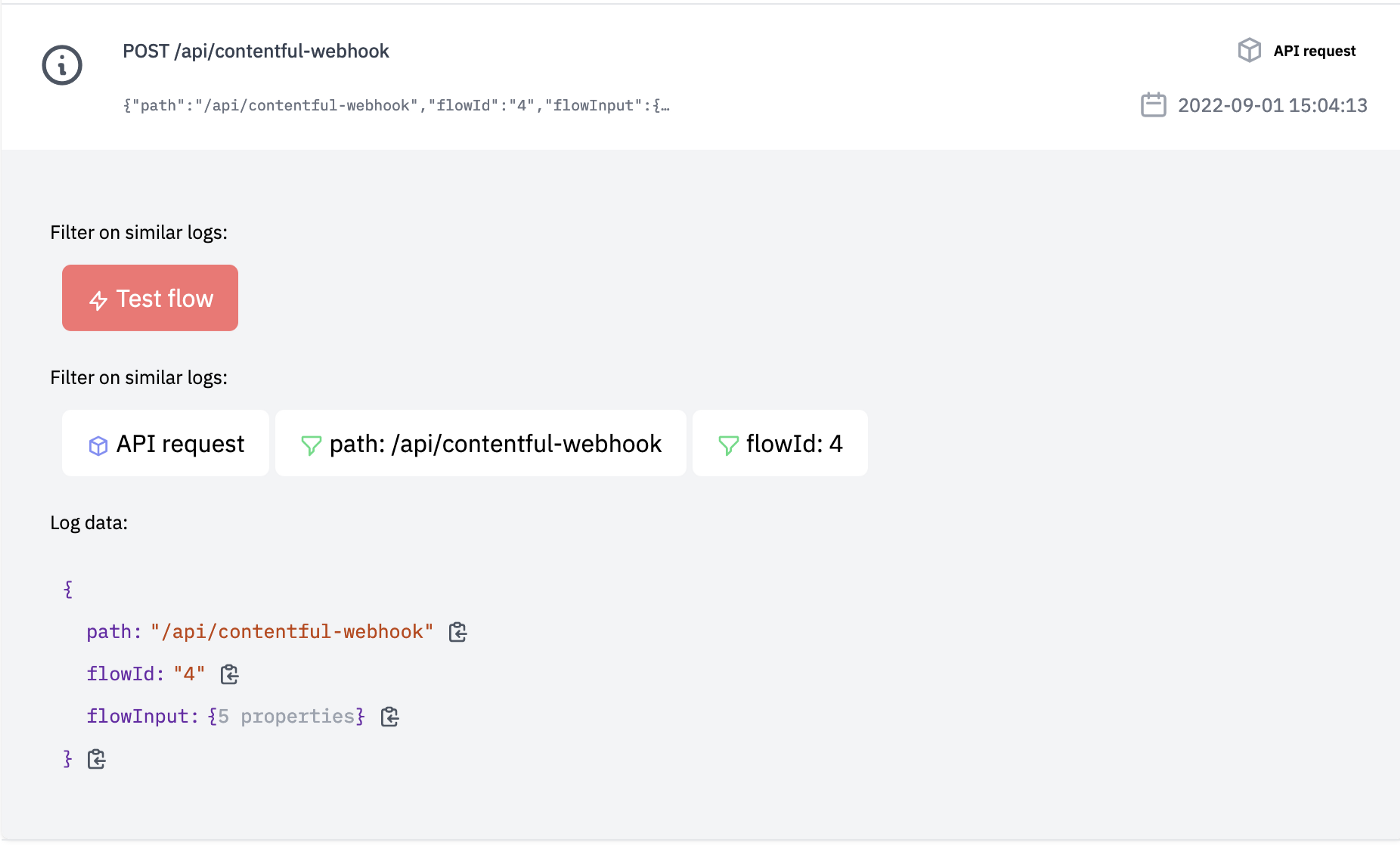
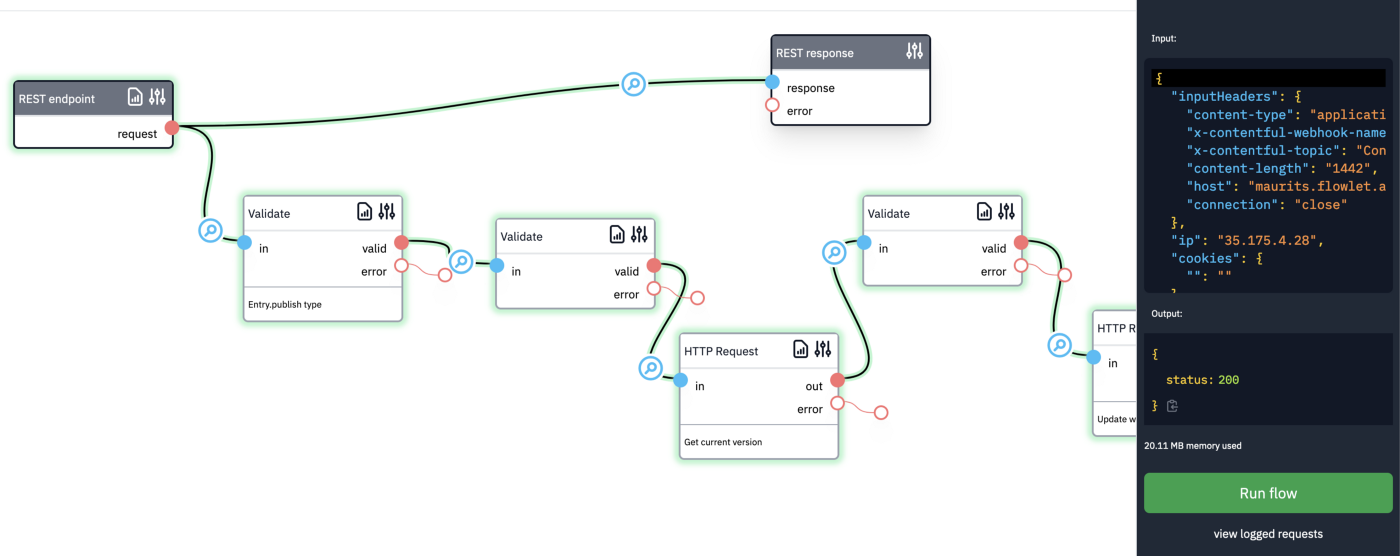
Update and publish a blog entry in Contentful and return to Flowlet. Click on the "Test flow” button on the top-right of the flow page and then click the "view logged request” link (this only appears when the save to log option is enabled). You should now see the last request made by Contentful. Click on it to see details, and click on the "Test flow” button to go back to the flow. This prefills the input data in the sidebar with the actual data from the Contentful webhook.
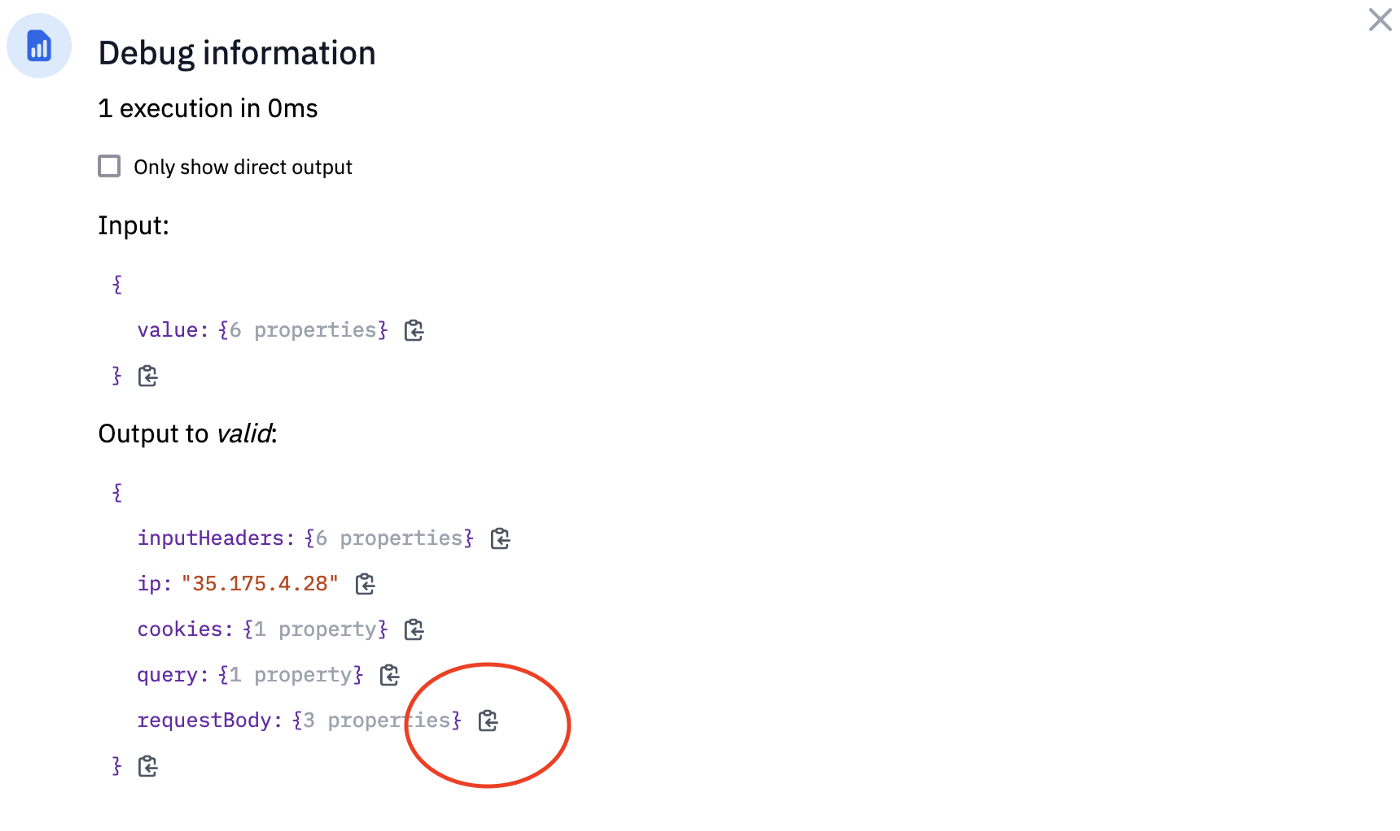
New buttons appear on the blocks after running the flow. These let you inspect the input and output data of these specific blocks. Click on this icon at the request block. You should now copy the JSON data of the body property.
Proceed with creating a validate block after the request block. Choose "Edit schema” in its settings and click on "generate or import”. You can now use the copied JSON value to generate the validation schema.
The last step is to add another request to update the content. The Contentful Management API has two options for updating an entry; you can use the PUT method and send the whole (updated) entry in the request or use the PATCH method and send a body in the JSON patch format. You may directly code the patch in the input for the request block. In our example, we've used the code below:
[
  {
    op: "add",
    path: "/fields/wordcount",
    value: {
      "en-US": input.requestBody.fields.body["en-US"].content.reduce(
        (count, item) =>
          count +
          item.content.reduce(
            (count, item) => count + item.value.split(/[\s]/).length,
            0
          ), 0
      )
    }
  }
]
Also, set the Content-Type header to application/json-patch+json, provide the current entry version in the X-Contentful-Version header, and add the API key to the secret input. You can retrieve the version with the code input.body.sys.version.toString().
You can rerun the flow from Flowlet to update the entry. If that works, you can edit and publish an entry in Contentful. Then refresh the page and check if the word count was updated accordingly.
Conclusion
All APIs have their own peculiarities. In Contentful, you must handle the optimistic locking, a concept many developers might not have seen before. You need to add this to the HTTP request headers. Furthermore, the content type differs from the typical "application/json” type, and we need to secure our webhook with authentication. Flowlet handles these requirements without the need to write custom code. In fact, we've only used coding to construct the URL (a simple string literal) and create the patch, which is at the core of what we've achieved.
Want to build your microservice using Flowlet?
- Join the waitlist for the private beta
- Follow us on Medium, Twitter, or LinkedIn