Hubspot is a powerful marketing and sales CRM, and their API lets you access data stored in their systems so that you can use it in your apps and integrations. In this article, we'll show you how to make Hubspot API calls using Flowlet without the need to code.
Obtaining Hubspot API keys
To make Hubspot API calls, you need a token to authenticate your requests. That used to be an API key, but you'll find that Hubspot has superseded those keys with something called "Private apps". Each private app gives you a token that, in fact, is an API key. The difference is that Hubspot private apps let you create a token per application and narrow the scope for each. That improves the security of your account by following the principle of least privilege.
To create a private app, click the cog on the top-right corner of your Hubspot account, click "Integrations", and then "Private apps" in the sidebar.
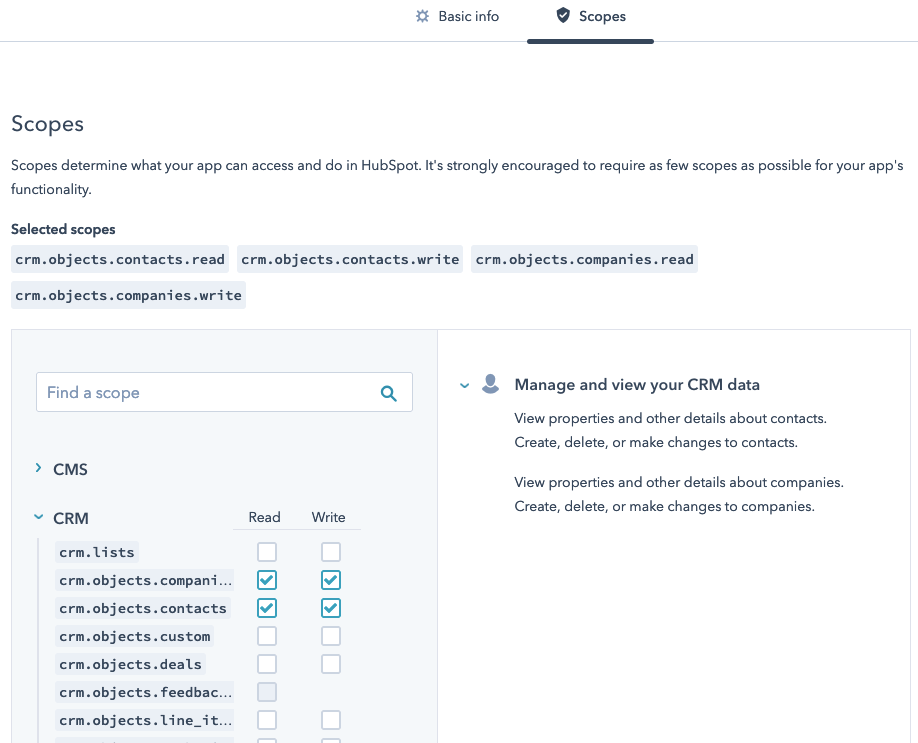
When creating an app, you must provide a name and the scopes. The scopes determine which resources the newly created token has access to. In this blog post, we'll create a contact entity as an example and hence need the "write" permission for contacts. You may want to add more scopes for further experimentation.
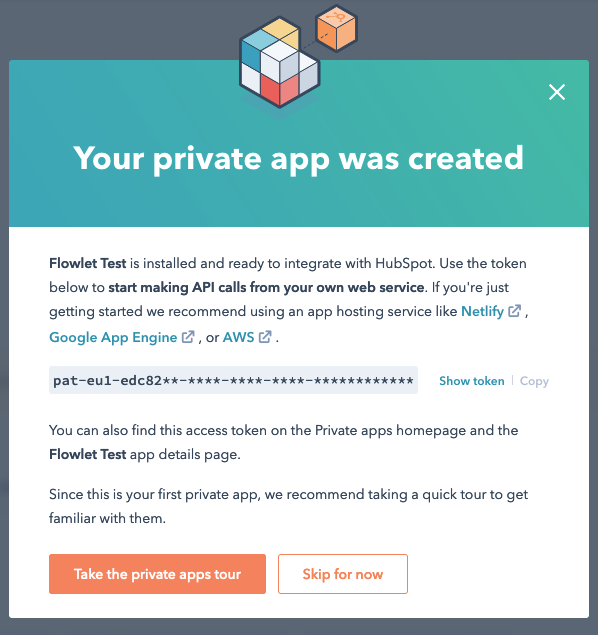
Copy the token that you get directly after creating your app.
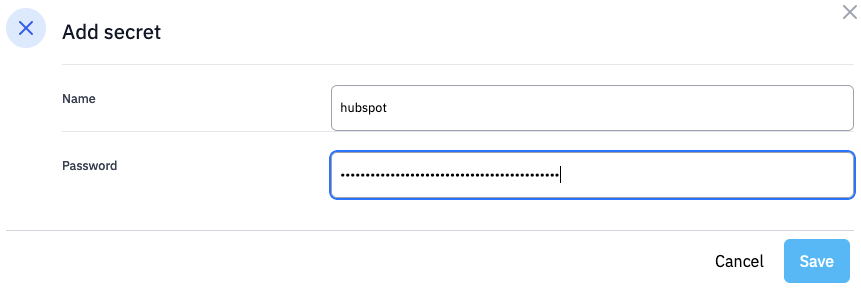
Then, go to "secrets" under your Flowlet workspace's settings. Create a new secret of the "password" type. Give it the name "hubspot" and set the token as the password.
There are more types of secrets in Flowlet. You can use three of them for authorizing requests. Besides "password", these are "basic authorization" and OAuth2. The latter is used for public apps connected to multiple accounts.
Creating a flow to test
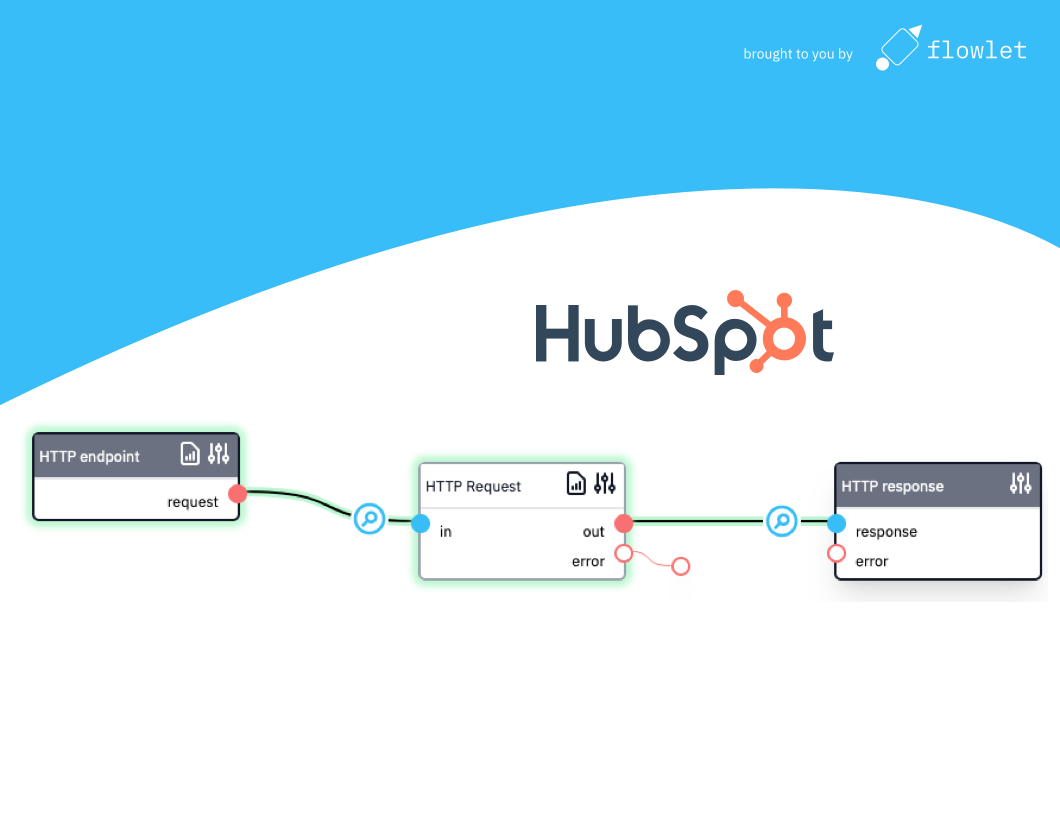
We want to trigger the API call somehow. For example, create an HTTP endpoint flow, set the method to POST, and generate the post body from the following JSON code:
{
  "company": "Biglytics",
  "email": "[bcooper@biglytics.net](mailto:bcooper@biglytics.net)",
  "firstname": "Bryan",
  "lastname": "Cooper",
  "phone": "(877) 929-0687",
  "website": "biglytics.net"
}
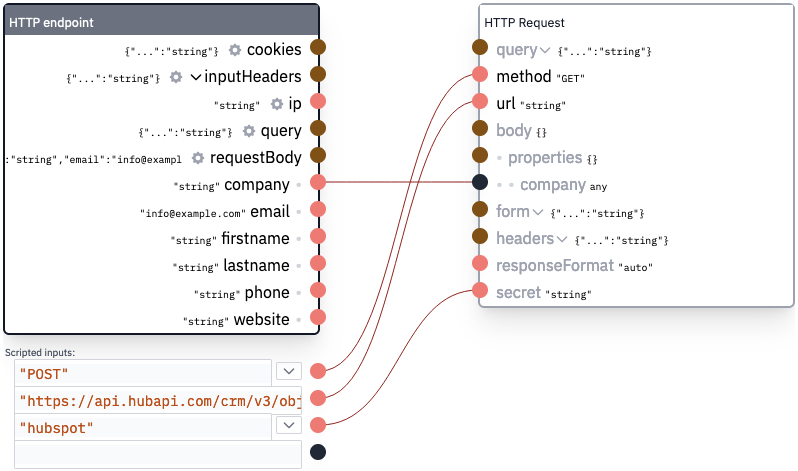
To make an HTTP request, drag the "request" pin from the start block to an empty space. The "Add block" dialog appears when we select the "HTTP request" block. The mapping dialog pops up. Before we know what to fill in, we'll look at Hubspot's API docs.
Exploring the developer docs
You'll find that most services you want to connect with have a separate developer portal, such as Hubspot developers. Within this portal, you'll find the API reference that lists all available calls. In this case, we are interested in the Contacts API. Click on the "Endpoints" tab and select the "Create" call in the dropdown. That brings you to the documentation on creating a contact using the Hubspot API. You can see that we took the JSON example above from this page.
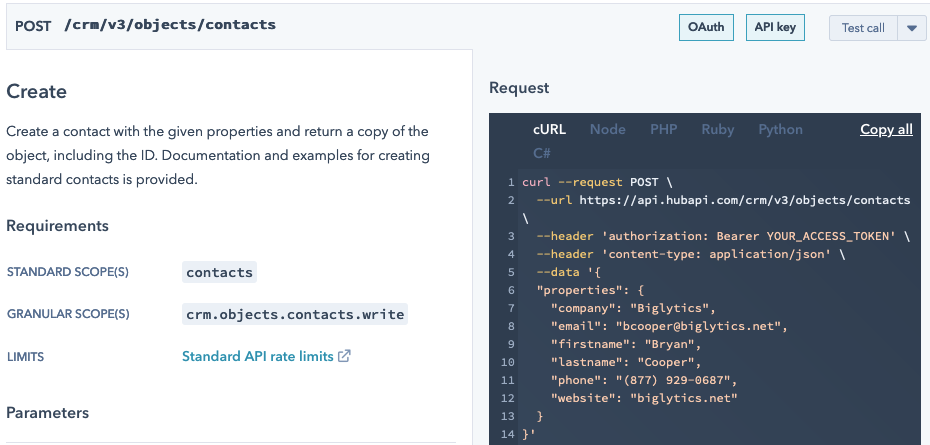
According to the docs, the scope crm.objects.contacts.write is required for this call. The Private App's configuration did not mention this exact name, but it's just the "write contacts" permission listed there.
In the command line example (using curl), you'll see that the method is POST, and the URL is https://api.hubapi.com/crm/v3/objects/contacts. Furthermore, they provide the header Authorization: Bearer YOUR_ACCESS_TOKEN.
Making API calls in Flowlet
We ended the test flow at the mapping dialog. If you closed it, you may re-open it by clicking the hourglass icon at the line to the HTTP request block.
You can easily set the HTTP method and URL in Flowlet. Also, provide the authorization by selecting the "secret" input with the secret you've created. That will add the Authorization: Bearer TOKEN header seen in the docs, where the actual value of the secret replaces TOKEN. For this, you can drag the secret pin to an empty field on the left. You'll see that the field changes to a dropdown that lets you select the correct secret.
The last thing to configure is the post body. Hubspot expects an object with the "properties" property that holds all our data. You can construct such objects from the mapping dialog. For example, drag the "company" item on the left to "body" on the right. You are asked how you want to map this data. This is the crucial step in constructing new objects. Select the second property and type in "properties/company".
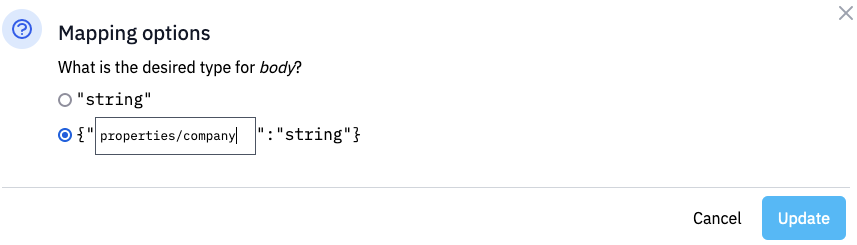
You can see an example of the completed mapping in the following screenshot.
Testing the API call
In Flowlet, click the "Test flow" button on the top-right corner. Scroll down in the input field and fill in some sane details to post to Hubspot.
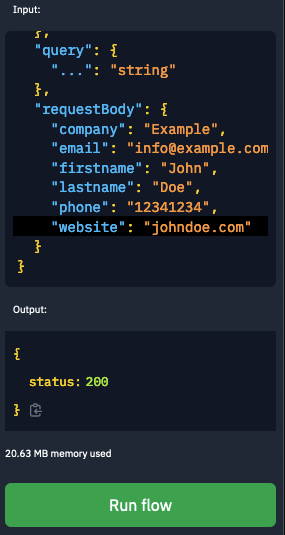
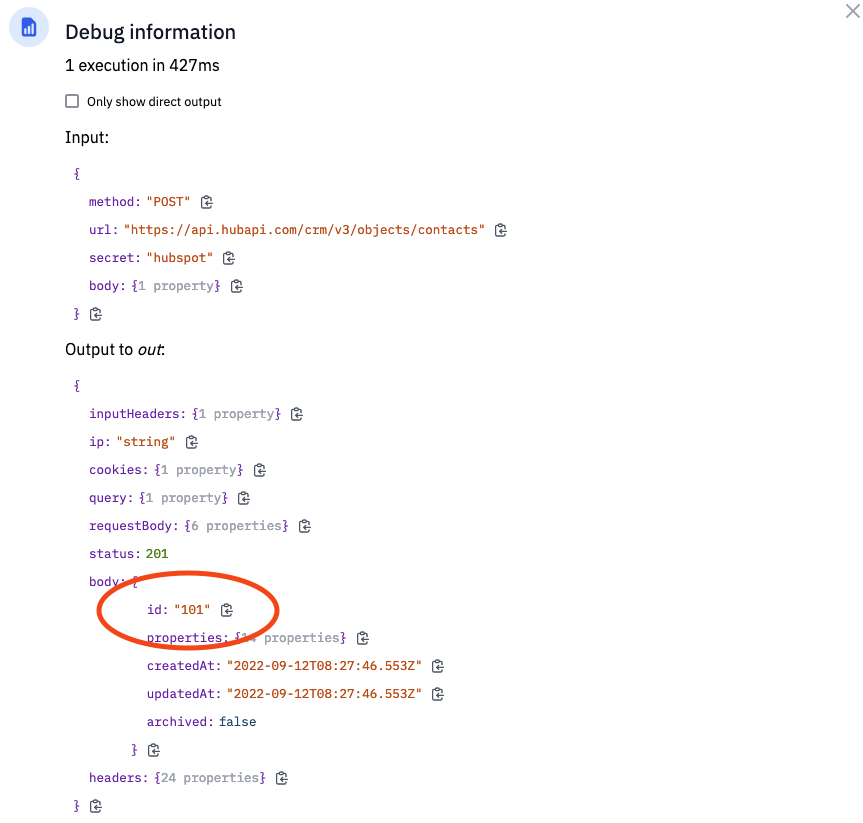
The blocks that ran successfully get a green shadow after clicking the "Run flow" button. A new icon appears that lets you inspect its in- and output.

You'll see the response from Hubspot in the output, with the ID of the contact entity just created.
We can also check the entity in Hubspot itself, where we see the new item on the contacts page.
Conclusion
With just a few clicks, you can easily connect your HubSpot account to Flowlet and add custom logic. Creating contacts is just one example. You can create and edit all your data with their API. You can use low-code flexibility to enrich your data or automate marketing tasks.
Want to build your API integration using Flowlet?
- Join the waitlist for the private beta
- Follow us on Medium, Twitter, or LinkedIn