In today's use case we will send custom images upon a webhook triggered by an app created in Glide. With the help of Robolly, we can easily customize images and send them along with mail messages.
Setting up the Glide app
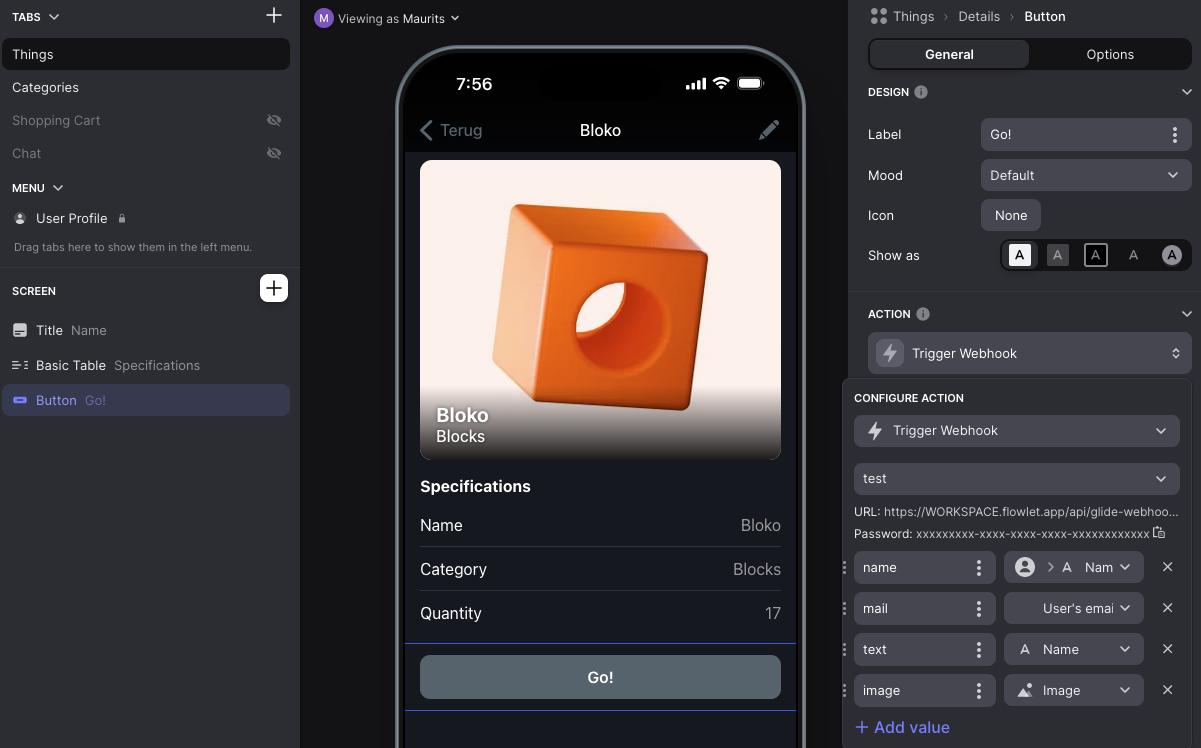
You'll need to create a new account on the Glide website to get started. We started with one of the suggested templates and added a button somewhere. You can add this after clicking on the plus button in the left sidebar, aside from the header reading "screen”.

After the button is added, you will be able to select an action in the right sidebar. Choose "Trigger Webhook” and add a URL. Use the URL https://WORKSPACE.flowlet.app/api/glide-webhooks/button, where WORKSPACE is replaced with your Flowlet workspace name. You may change the part after /api/, as long as you use the same path when configuring the flow later on.
A webhook accepts custom parameters. In our example, we'll add "name”, "mail”, "text”, and "image”, but you can send whatever suits your needs. If everything is set up, you will end up with something similar to the screenshot below.
Catching the webhook in Flowlet
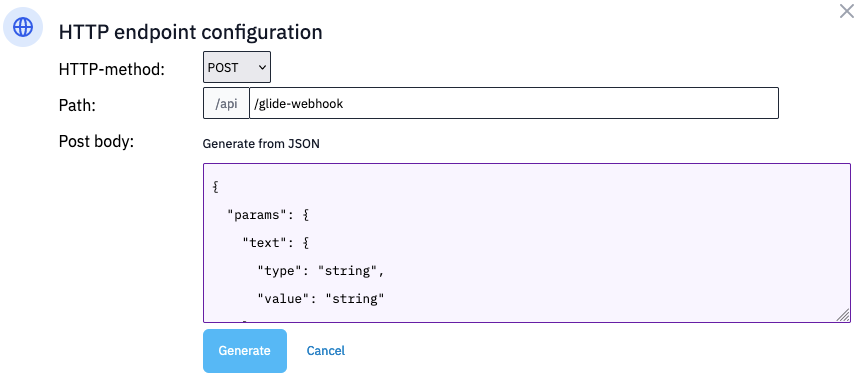
Glide shall send a webhook request on each button click, but we will want to see that in action. First, create a new HTTP endpoint flow in your workspace. Click the configuration button on the top right of the start block and click on "Configuration”. A dialog comes up with various options for your HTTP endpoint.
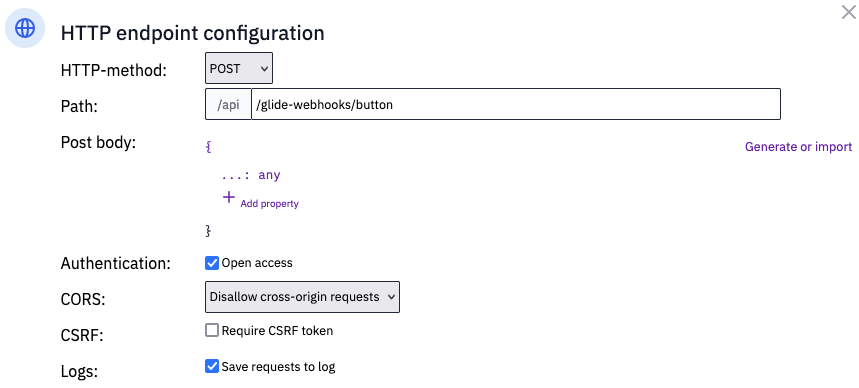
Set the method to POST. Almost all webhooks use the POST method, so it's a sensible guess even without reading Glide's documentation. Also, check the "Save requests to log” button and save the configuration. That feature provides a convenient way to test requests made by other systems (Glide in this case).
Now that a simple flow is ready go back to Glide and hit the button where the webhook is configured. It still does not give us a heads-up, but we can go back to Flowlet and take a look at the logs, accessible from the sidebar. You'll see the incoming webhook showing up if everything is configured well. It is possible to inspect the posted values when you click on it or hit the red "Test flow” button to go to the flow debugging interface. From there, you can run the flow again with the same input and see what happens. Not much yet, actually, but we'll quickly connect it with Robolly to create an image.
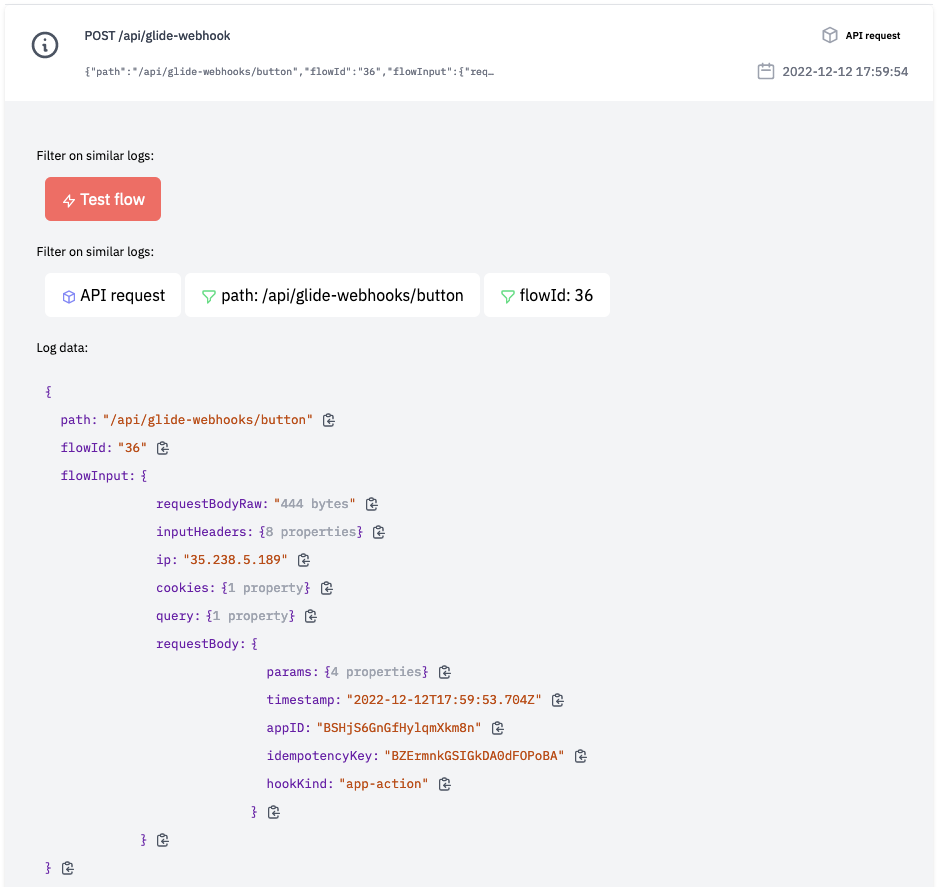
Now that you can see what Glide is sending to us, you may copy the contents (note the copy icons after all JSON elements) and use it to generate the post body scheme in the HTTP endpoint configuration. Use the "Generate or import” link in the configure dialog.
Paste the JSON and hit the "Generate” button.
This configuration tells Flowlet which values we can use from the post body. We'll see later how this is used.
Exploring Robolly
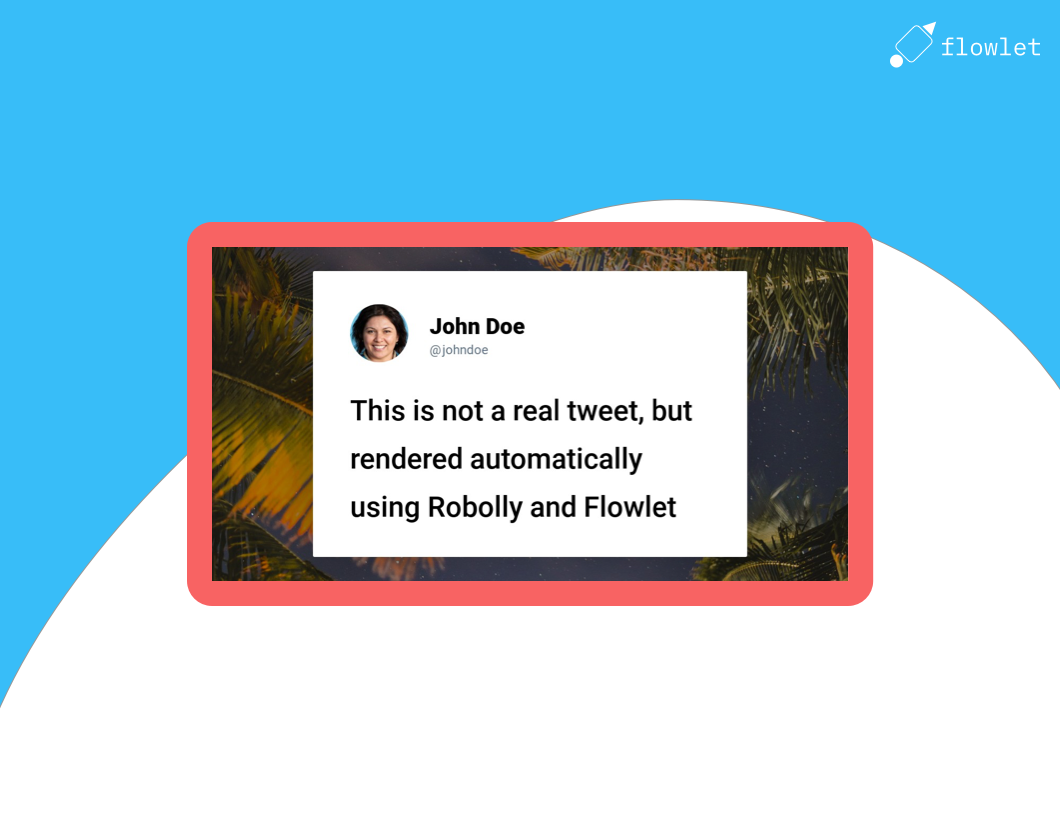
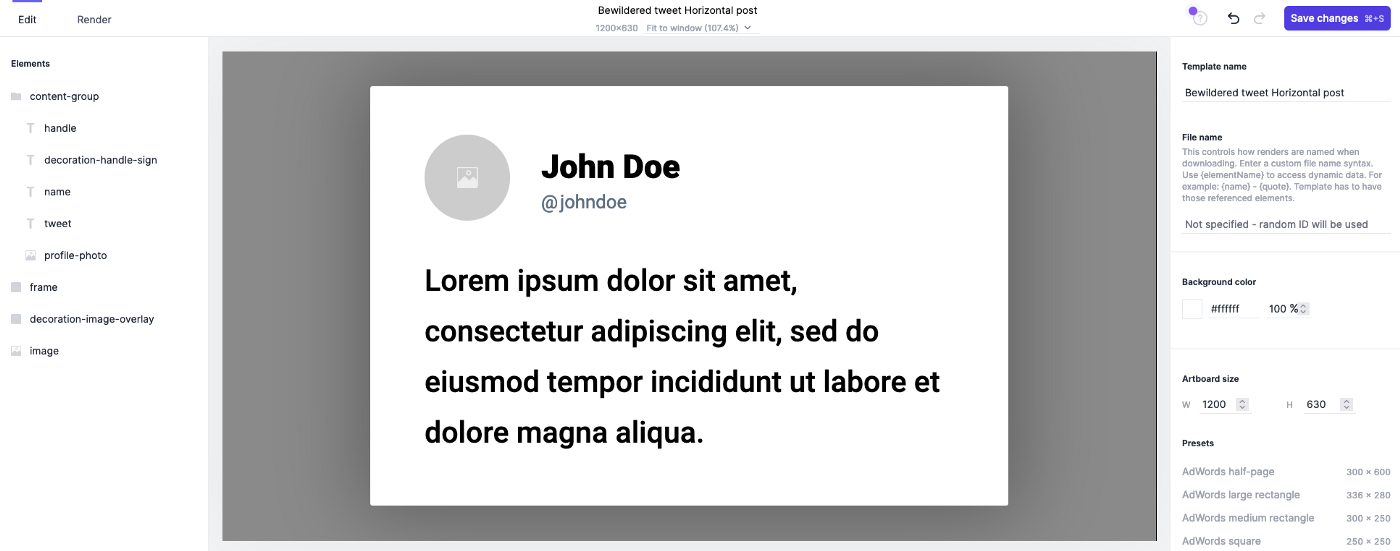
Robolly is a powerful image rendering tool that can be used to create custom images for your email and social media campaigns. It lets you easily add text, logos, and other images to your templates with just a few clicks. After signing up, you'll have the possibility to clone an example template. We used the "Bewildered tweet Horizontal post”.
At the "Render” tab, you'll find some render links. We will use the "Render link with modifications”, which looks like this:
https://api.robolly.com/templates/TEMPLATE_ID/render.jpg?tweet=TEXT&name=NAME&image=URL
The parameters differ per template, but the general concept is the same.
Connecting Glide with Robolly
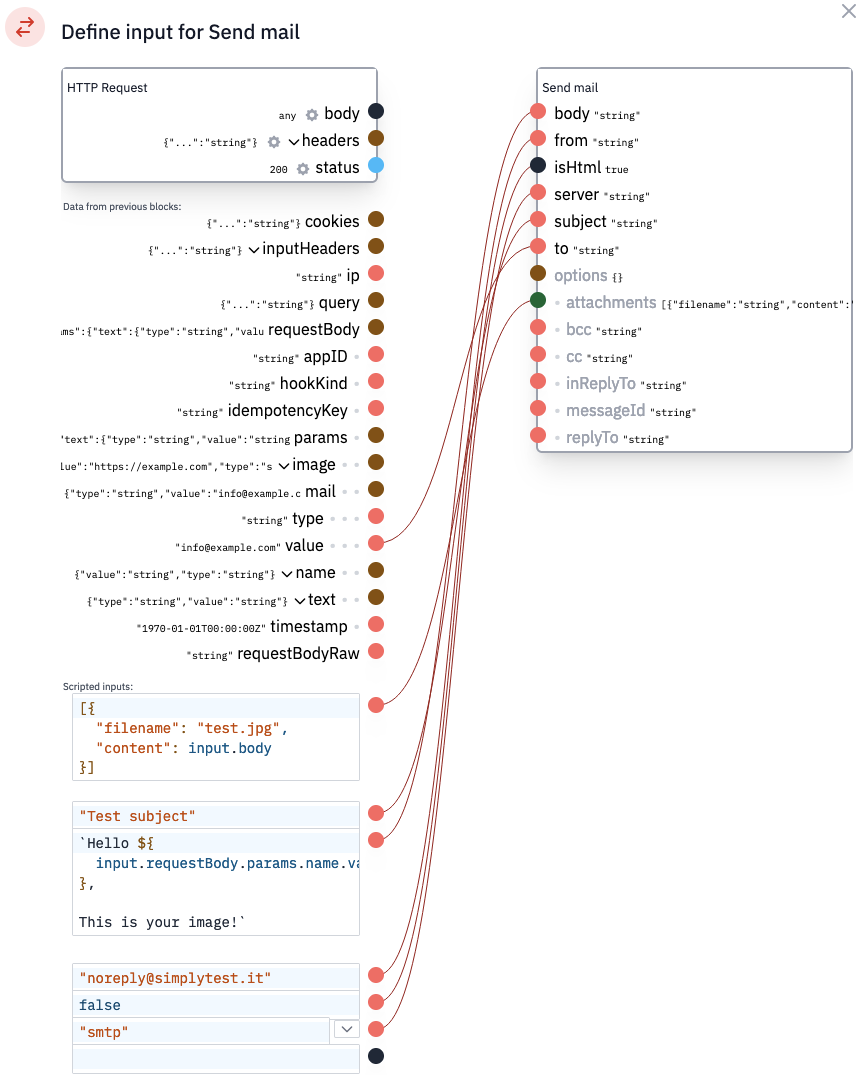
Let's generate the image with Robolly when clicking the button in the Glide app. The logic action here is to request the URL above when a webhook request comes in. Go back to the HTTP endpoint flow in Flowlet. Here, the right side of the start block has the label "request” and a loose endpoint. Now, drag that endpoint to an empty space on the screen. A new dialog titled "Add block” shows up. Search for "HTTP request” and add it. After you do that, another dialog appears that allows you to specify the input for the HTTP request block, based on the input of the webhook. We can complete the link between Glide and Robolly here, as shown below.
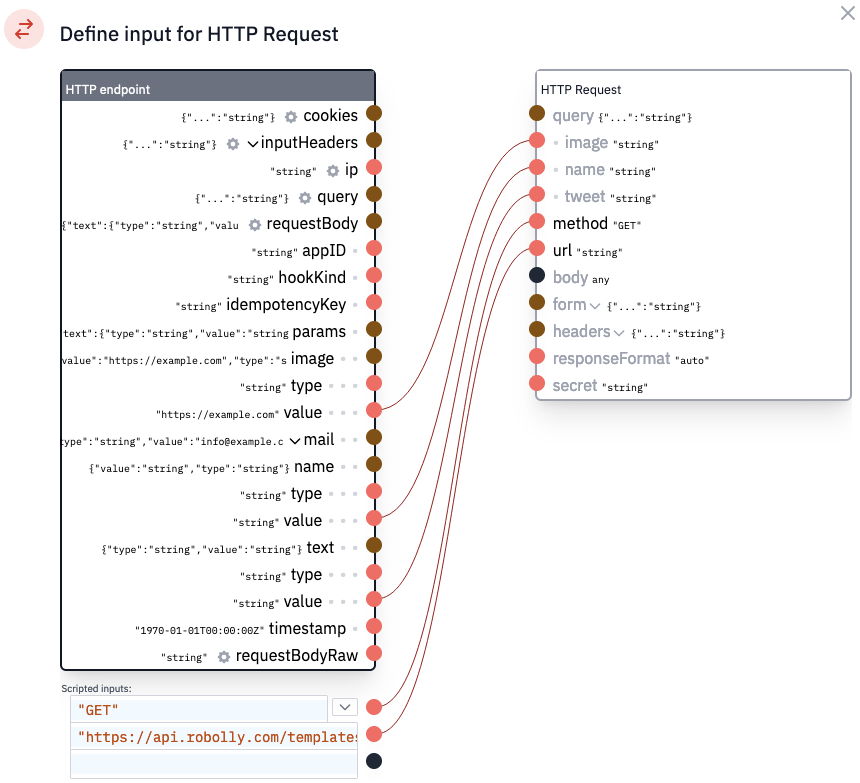
Note that the "Scripted inputs” on the bottom left contain JSON values; hence the URL is enclosed with quotes. Otherwise, you will get an error when pressing "Save”. You may also use TypeScript in these fields, but it's not required for this example.
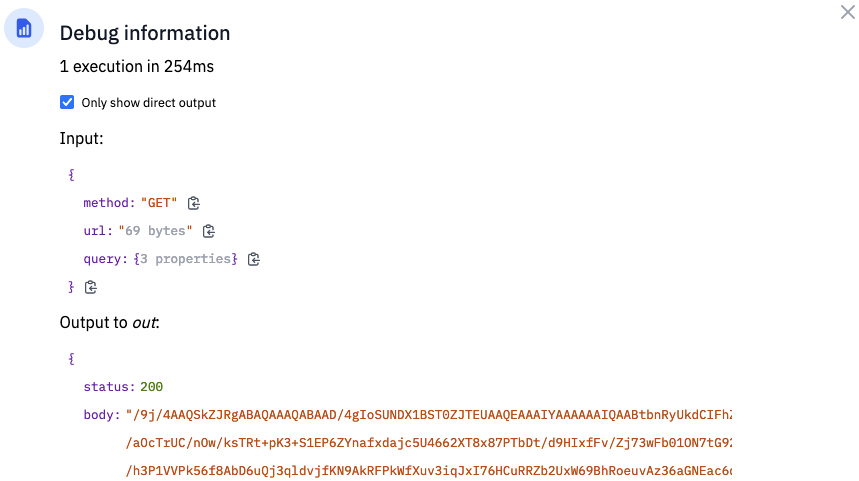
After the HTTP request is configured, you may hit the "Test flow” button from the logs and then the "Run flow” button to test it. The blocks turn green if they run correctly.
Furthermore, a new button on these blocks lets you inspect the input and output per block. For the HTTP request block, you should see that it comes back with some image data, which is base64 encoded.
We have to post the image data somewhere to make it visible. The next step will send it as a mail attachment.
Sending emails over SMTP
You have to bring your own SMTP server if you want to send mail from Flowlet. You may use your own mail account (Gmail, for example) or use a service like Mailgun for this. This service (like many others) provides its own REST API to send mail but also provides an SMTP relay. So, whatever your mail service is, you can use SMTP to send mail. In Flowlet, this functionality is provided by the "Send mail” block (or with the mail.send function in custom scripts).
Note that when you use Mailgun, like in this example, you have to use "smtp.eu.mailgun.org” when using the EU instance. Otherwise, it's "smtp.mailgun.org” as written in their documentation. You can find the username and password in their admin interface.
The mail block accepts the base64 encoded data as the attachment contents. The mapping doesn't allow us to create arrays (lists). Hence we have to use the scripted input here. You can access all data from the left side in the "input” object within these fields.
Note that we didn't provide the SMTP server directly. Instead, we've created a "password” secret in the workspace settings. This secret contains the SMTP connection string, formatted as:
smtp://USERNAME:PASSWORD@SERVER
Mailgun usernames include an "@” sign, which must be URL encoded. Hence the value looks like:
smtp://postmaster%40mg.example.com:PASSWORD@smtp.mailgun.org
Connect services using Flowlet
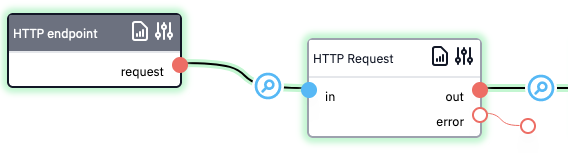
Now that we have discussed all parts — receiving the webhook, rendering the image, and sending mail — we can complete the flow to connect all of them. All actions are executed one after another in this example, as shown below:

Note that all flows must end at the end block. Otherwise, your webhook will return an error response. After the configuration is completed, we can hit the button in Glide and — if all went well — see the mail arrive with the generated image attached.
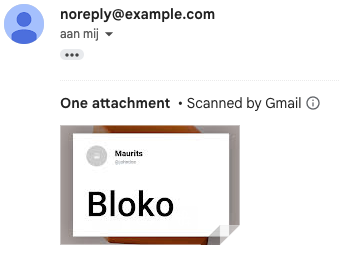
And there we have it. The text and image come from the product page in the Glide app.
Generating signed URLs for Robolly
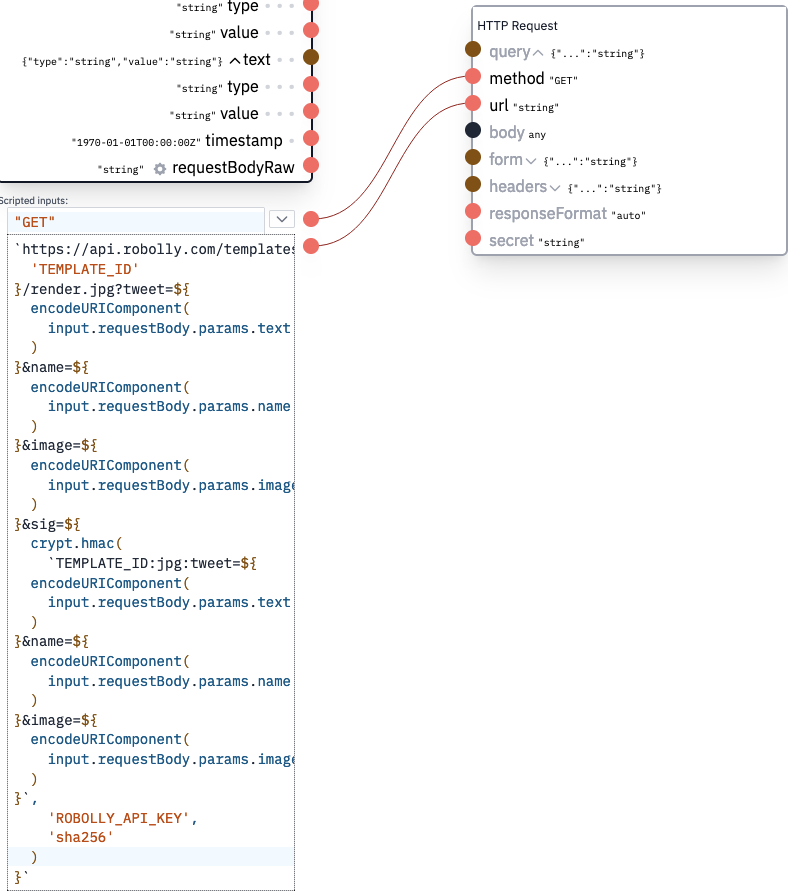
The URL used for Robolly does not use any authentication (yet you must know the template id). This might not be a concern because the template itself doesn't likely contain confidential data. However, Robolly provides an option to oblige signatures on each request. The signature is created using a SHA256 HMAC on the string APIKEY:FORMAT:QUERY, for example, xxxxx:jpg:[tweet=TEXT&name=NAME&image=URL](https://api.robolly.com/templates/63976cb43b1b30621ef96e65/render.jpg?tweet=Lorem+ipsum+dolor+sit+amet%2C+consectetur+adipiscing+elit%2C+sed+do+eiusmod+tempor+incididunt+ut+labore+et+dolore+magna+aliqua.+&name=John+Doe&handle=johndoe). Some custom code is required to construct this URL. If we do this, we have to provide the parameters in the URL because the order matters.
We can use the crypt.hmac function to create the signature, as seen in the example below.
The request with a signature is not as clean as the request that isn't signed. The reason is that this kind of authentication is not standardized. The "secret” input (with the secrets section in the settings section) is designed to quickly provide standard authentication schemes, including basic auth and OAuth2. However, we can still get this to work because we can continue in code wherever we are stuck in no code.
Wrapping up
The Glide app webhook and Robolly rendering make it possible to mail custom images without writing code.
Can't wait to connect APIs with Flowlet?
- Get started with a 7-day trial
- Follow us on Medium, Twitter, or LinkedIn