This article will show you how Flowlet can easily handle custom Slack commands via the Slack API. We will explain the steps needed to set up the app and custom commands, use the OAuth flow to add the app to your workspace, and handle calls from Slack in Flowlet to respond to invoked commands. In the last step, we'll explain how to validate the signatures that come with the command invocation messages.

What is a Custom Slack Command?
A custom command is a slash command that you create yourself. You can use a custom command to do much more, including controlling business workflows or providing a valuable service for Slack users.
In this blog, we'll build the "/hello” command. When a user gives in "/hello John” it replies with "Hello John”. This is just a ‘hello world' example demonstrating the steps required to build more meaningful features.
Slack sends an HTTP POST request to a pre-set URL when you execute the command. This endpoint can take some action based on the provided command and may directly respond with a message. That is exactly what we're going to do.
Several extensions are possible when you have the basic command running. For example, you can add buttons to the message so that users can provide a follow-up action.
Set up the Slack App with Custom Slack Command
To set up the Slack app, go to their developer portal and click the "Your Apps” button on the top-right corner. Then hit the "Create new app” button to get started. You're asked if you want to use a template or build from scratch. We'll choose the latter for our use case. You have to provide a name and test workspace.
Now that your app is created, you can copy over some identification numbers. You must copy some details forth and back from a Flowlet secret, which you can make at the Secrets tab in your Flowlet workspace settings. Copy over the following:
- Fill in the Redirect URL from Flowlet to the Redirect URLs under "OAuth & Permissions” in the configuration of your Slack app.
- In Slack, go to "Basic information” and copy over the Client ID and Client Secret to your Flowlet secret.
- Also, note the "Signing secret”. We will need this secret later.
- Fill in "https://slack.com/oauth/v2/authorize" as the authorization endpoint and "https://slack.com/api/oauth.v2.access" as the token endpoint.
- Enter "commands” in the scope field. You might add more scopes, but this is the only one required for this tutorial.
Let's add this app to your workspace. Click on the "Manage tokens” link On the Flowlet secrets page. The "Request access token” link will lead you to a page where you can choose your workspace and authorize the app you've just created. Do this now, and you'll return in Flowlet. You may click the "Manage tokens” links again to verify that you now have an access token.
That was everything to create an app. However, this app doesn't do anything yet. It cannot even say hello (world). So, in Slack's app settings, click on "Slash Commands” (in the sidebar), hit "Create new command” and give in the command "/hello”.
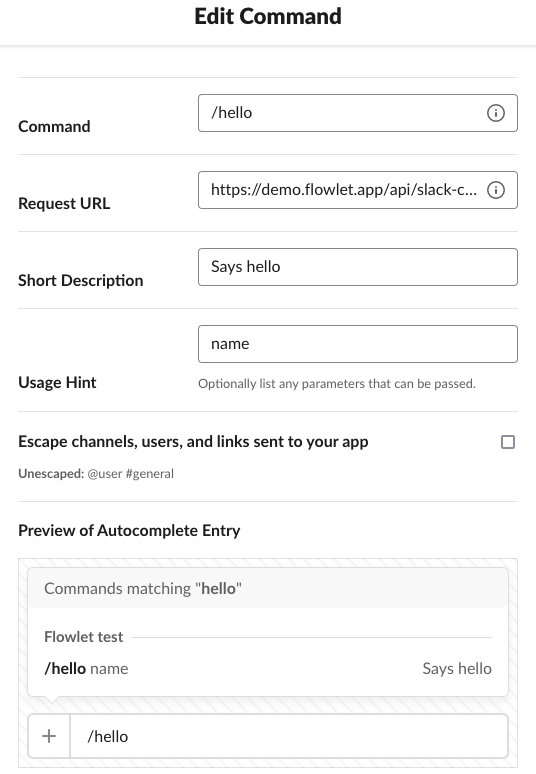
The following field — the Request URL — is an important one here. Its value must be an endpoint that you create in Flowlet and thus will be something like https://WORKSPACE.flowlet.app/api/slack-command, where WORKSPACE is the name of your Flowlet workspace. The following step is to set up this endpoint.
Handle invocations in a flow
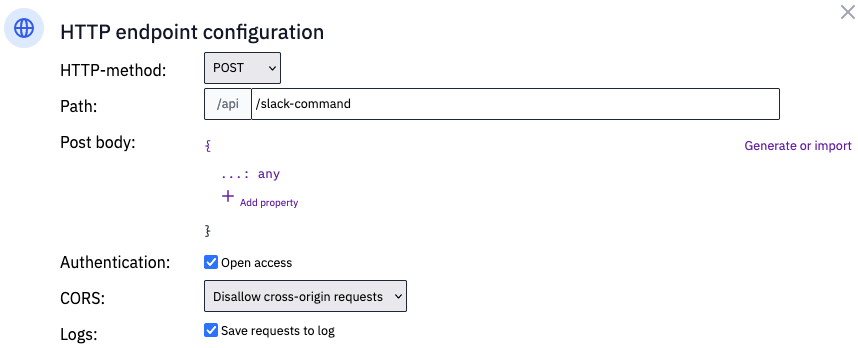
We can add an HTTP endpoint flow in Flowlet to handle the command invocations, but we don't know the expected input and output yet. Before losing ourselves in the docs, configure the flow and see what comes in. The marshmallow tower challenge reminds you that the quickest path to a solution is to start testing. To facilitate this, the HTTP API endpoint configuration has a checkbox "Save requests to log”. Ensure that the method is set to POST and that the input body can accept all JSON objects. Only requests that pass the initial validation are written to the log.
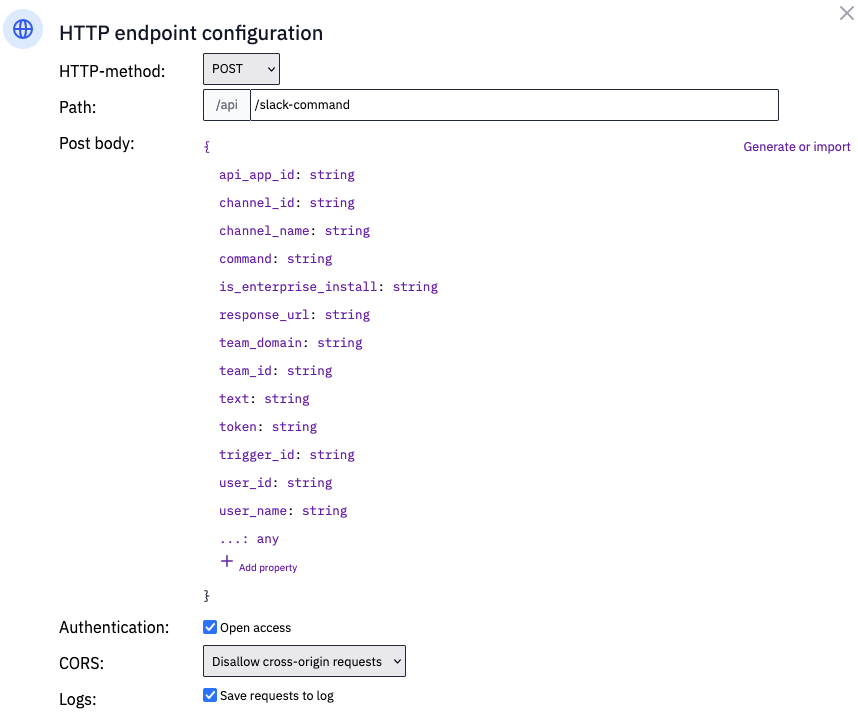
We can already send a command from Slack and check the Flowlet logs to see what's coming in. Use that information to generate the input schema for the HTTP endpoint, so you'll end up with the configuration seen below.
Next, we need to know what the Slack API expects from the endpoint. You can find a simple example in the docs. Now configure the end block and generate the schema from that example. If all goes well, you can short-circuit the start with the end block and provide a response like the one below.
[
  {
    type: "section",
    text: {
      type: "mrkdwn",
      text: "Hello " + input.requestBody.text,
    },
  },
]
If all went well, your mapping looks like this.
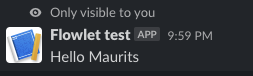
Going back to the Slack application, I can type "/hello Maurits” and get back the response "Hello Maurits” as I would expect from the code above.
Verifying the Webhook Signature
The custom command already works, but there is one issue. Everybody can send a POST request to your endpoint. How can you check that these calls are valid?
You must compute the signature and compare it to the one included in the request header to verify that the request is valid. If they match, you know that the request is genuine and can process it accordingly.
Look at the Flowlet logs and find the signature in the HTTP request headers. You'll see the x-slack-request-timestamp and x-slack-signature headers. Furthermore, remember that you got a Signing Secret earlier. It is used to calculate the HMAC-SHA256 from the "v0:TIMESTAMP:BODY” input string. Here, TIMESTAMP is replaced with the value from the timestamp header, and BODY must be the raw JSON body received. This is a common API strategy for validating webhooks, and for that reason, Flowlet provides a requestBodyRaw input property.
Connect the start block with a new "If-statement” block to validate the signature in your flow. For the "a” input, we'll use a code field with the code below.
crypt.compare(
  crypt.hmac(
    "v0:" +
      input.inputHeaders["x-slack-request-timestamp"] +
      ":" +
      input.requestBodyRaw,
    "a0ae88b7f4a03d81f024a26bfcd4b960",
    "sha256"
  ),
  String(input.inputHeaders["x-slack-signature"]).substring(3)
)
Flowlet provides the HMAC-SHA256 signature via the crypt.hmac function, as seen above. This method returns the signature as a hexadecimal string that has to match the X-Slack-Signature header. However, the value of that header has the format "v0=SIGNATURE”. We'll use a quick & dirty way of stripping that prefix for now.
Instead of crypt.compare, we might just compare the strings with JavaScript's equal operator. However, this leaves your application vulnerable to timing attacks, so we should use crypt.compare for comparing security tokens.
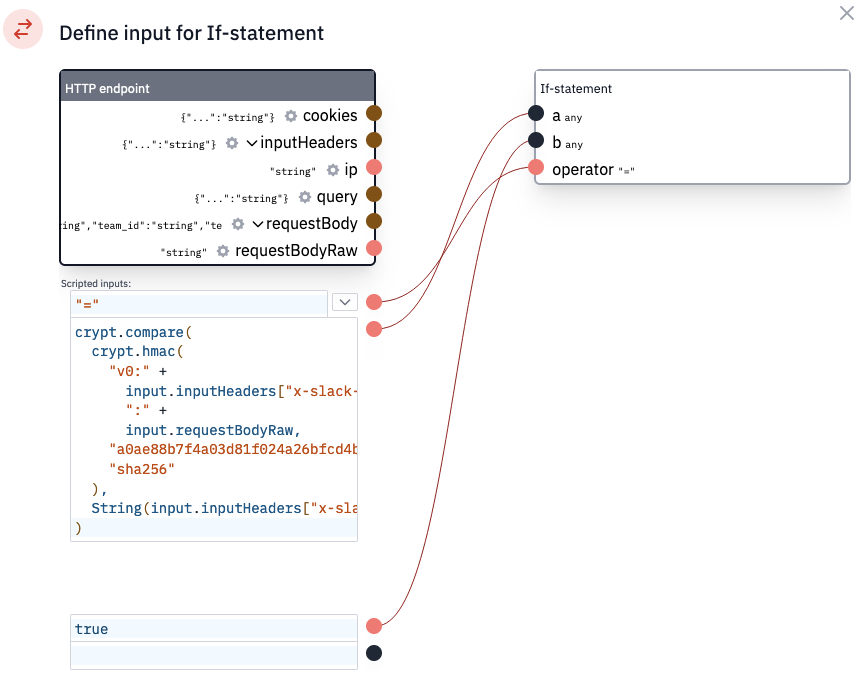
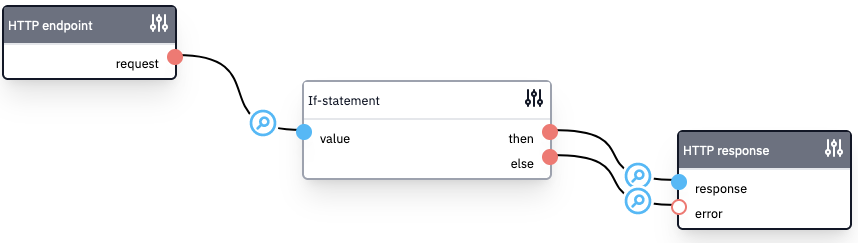
To finish the configuration for the "If-statement” block, connect the "b” input to a code field and enter "true”. You can continue the flow from the "then” pin while connecting the "else” pin directly to the error output.
Conclusion
This article shows you how to use Flowlet to get started building custom commands with the Slack API. We used code for the complex parts and to format the custom response, which is hardly more complicated than just JSON. Low code enables you to configure most of the application while keeping the flexibility to create meaningful integrations.
Want to build your API integration using Flowlet?
- Join the waitlist for the private beta
- Follow us on Medium, Twitter, or LinkedIn