This article will teach you how to connect OAuth APIs with Flowlet secrets. We'll build a flow that reads the Tweets posted by you using the Twitter API.

The OAuth2 authorization process
OAuth lets people log in with a 3rd-party user account. This can be done with a Login with Twitter" button, for example. Stepwise, the process is as follows:
- Anonymous user clicks on the "Login with Twitter” button.
- Users get redirected to a Twitter login page that asks if they allow app X to read their profile information, among other things.
- After accepting, the user returns to App X. This request includes an authorization code.
- App X exchanges the code with an access token using Twitter's API. The response might also include a refresh token.
- App X can use the access token to authenticate calls to the Twitter API, for example, to read the user's profile.
This process allows App X to operate on behalf of the user that logged in without obtaining the login credentials for Twitter. Furthermore, the user can revoke the access token at any time. Therefore, OAuth is a secure way to connect 3rd-party apps to your account.
The details for this process are set out in RFC6749 as the "Authorization Code Grant”. A few variations to this process exist for Single Page Apps and Native apps, as well as extensions such as PKCE and OpenID. The OAuth authorization can be daunting to implement from scratch, but Flowlet supports OAuth2 authentication out-of-the-box, even when PKCE is enforced.
Setting up your app for OAuth
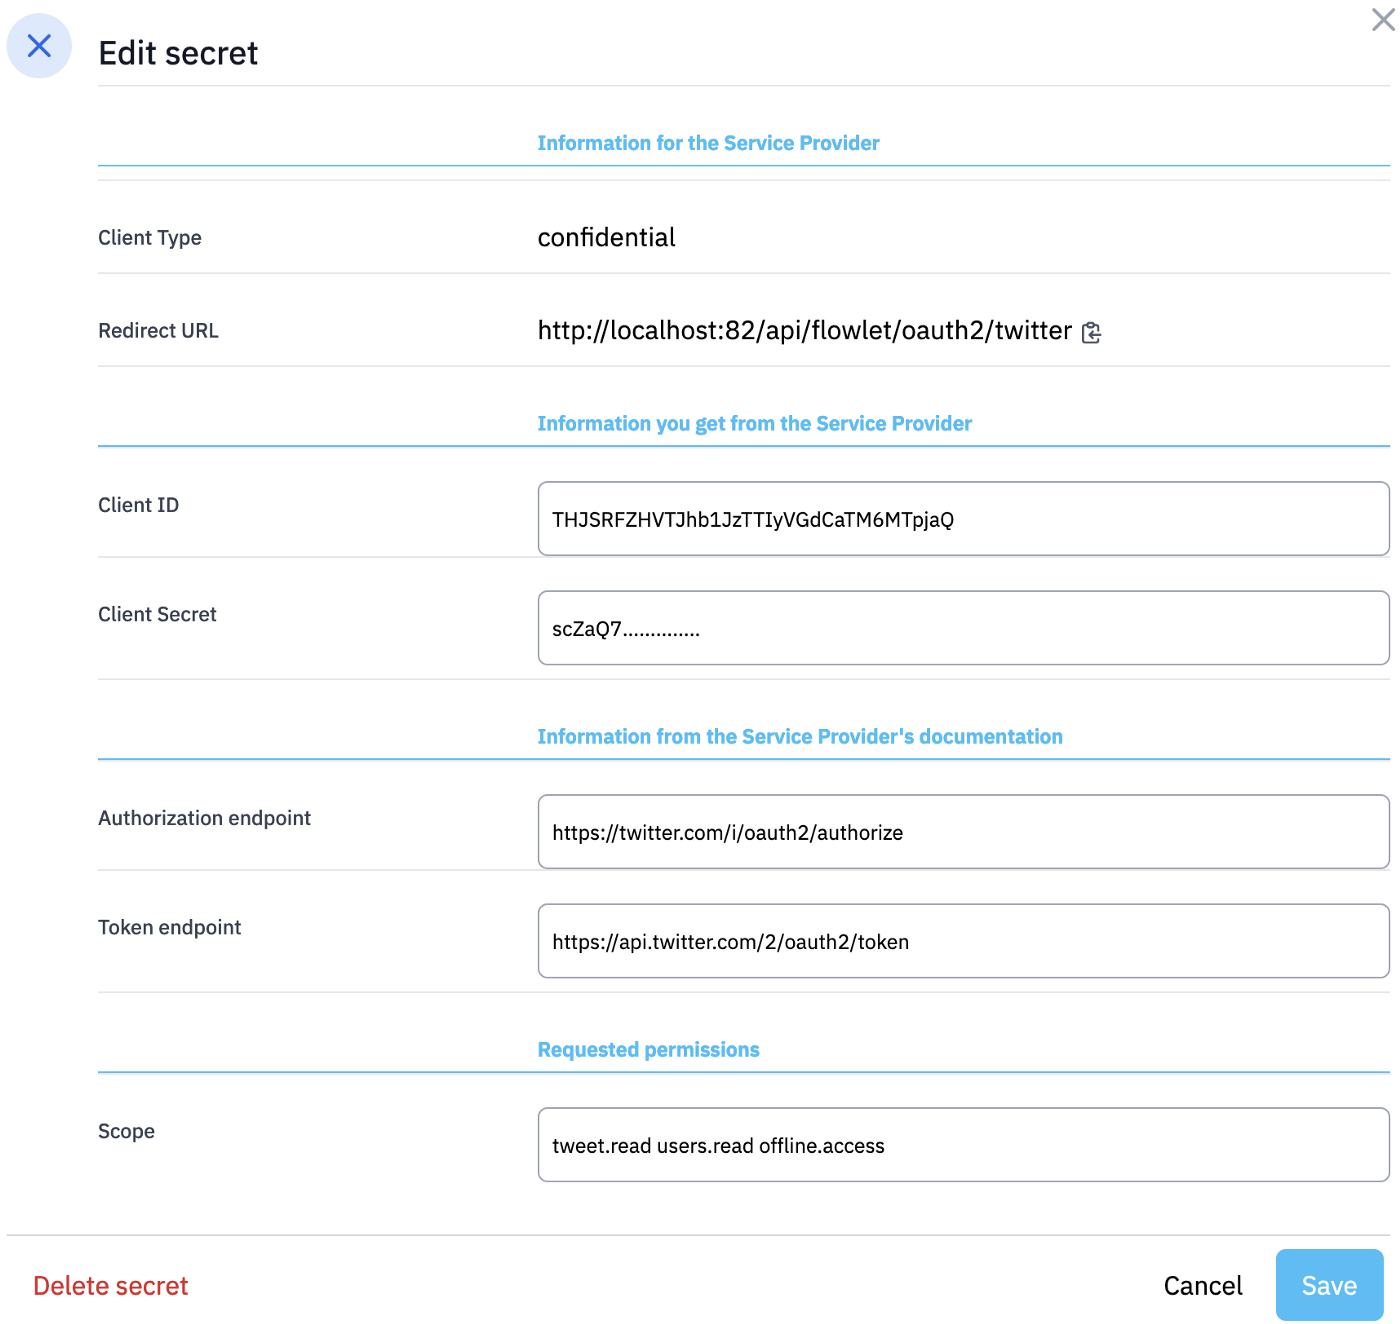
Both the app that wants to connect (the service provider or SP) and the identity provider (IdP, for example, Twitter) need information from the other party before they can connect. Before you can proceed, you need a few basic details. The first item is the OAuth Redirect URI. This is an URL at the SP (your app) where the IdP will redirect the user to after authorizing access. You can obtain this in Flowlet secrets, as described later. Also, you need to determine which scope you want to request. In OAuth, the scope is a set of permissions that you want your app to have. These are not standardized, so you have to review the IdP's documentation for the OAuth scopes they provide. The user will see which permissions your app asks for. It would be best if you keep this to the minimum you need.
The next step is to register your OAuth2 app at the IdP. You find this in the IdP's settings or sometimes on a separate developer portal, such as Twitter Developers. They will often ask you what kind of application you want to connect. In OAuth2 terms, we are building a confidential client. This is a client that can store secure tokens in a safe place. After providing your details, the IdP will give you a Client ID and Client Secret in return, which you need to provide to the SP (Flowlet).

Client ID and Client Secret at Twitter.
The last items you need are some URLs where the SP can connect to the IdP. These are the OAuth2 Authorization URI and the OAuth2 token endpoint. Some nice IdPs will give this data when registering your app, but you have to dig the docs to get it in many cases. Search these pages for keywords such as Authorize URI (or URL). The paths of these endpoints often contain "oauth2”, "/token”, or "/authorize”. For Twitter, these are
Authorize URI: https://twitter.com/i/oauth2/authorize
Token endpoint: https://api.twitter.com/2/oauth2/token
Now that you have all information, you can continue setting up the OAuth2 authorization in Flowlet secrets.
How to use Flowlet secrets
Go to your Flowlet workspace, or register for Flowlet if you haven't done yet. Click on Settings in the sidebar and go to the Secrets tab. From there, you can add a new secret. Choose the "OAuth2” type. You'll see a form where you can provide the IdP details described above. Also, it shows the OAuth2 Redirect URI you need to give to the IdP when registering your app.

Before we move on, pay attention to the scope set here. This includes "offline.access”. By requesting this scope, you'll get a refresh token, as well as an access token. The refresh token is used to refresh the OAuth2 Access Token after it expires and hence allows you to keep using the authorization beyond the lifetime of the access token. Flowlet automatically refreshes the access token the first time you want to use it after expiration. The "offline.access” permission is specific to Twitter, but many services have a similar mechanism.

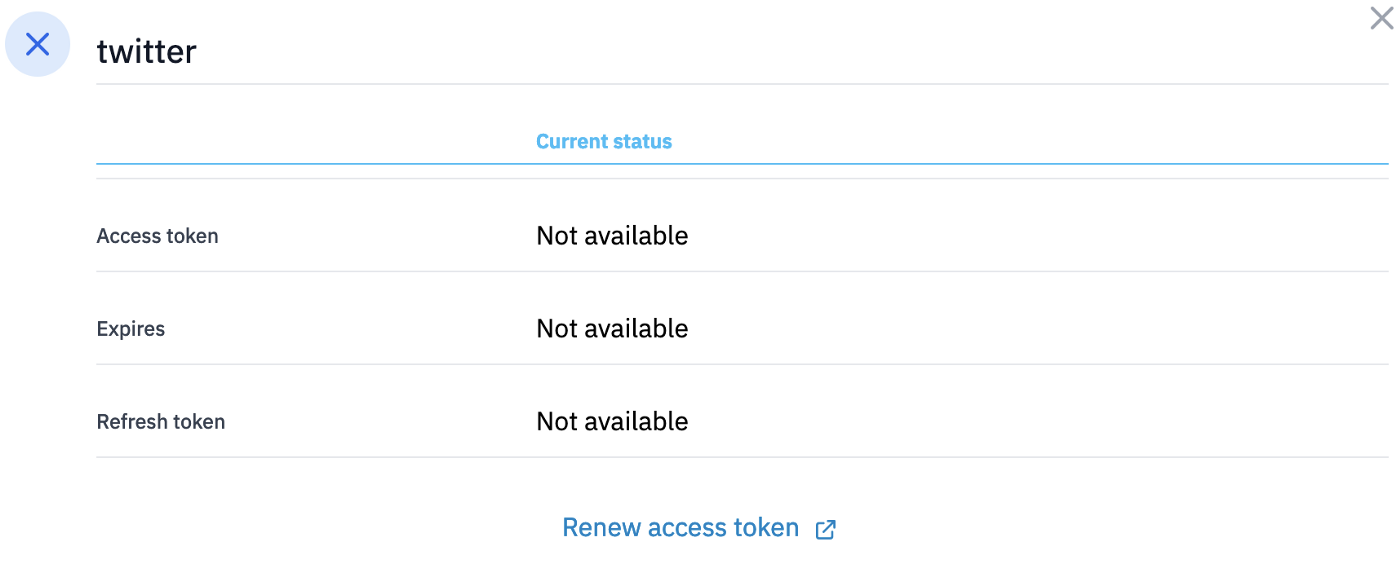
After completing the form, save the details and click the "Manage tokens” button.

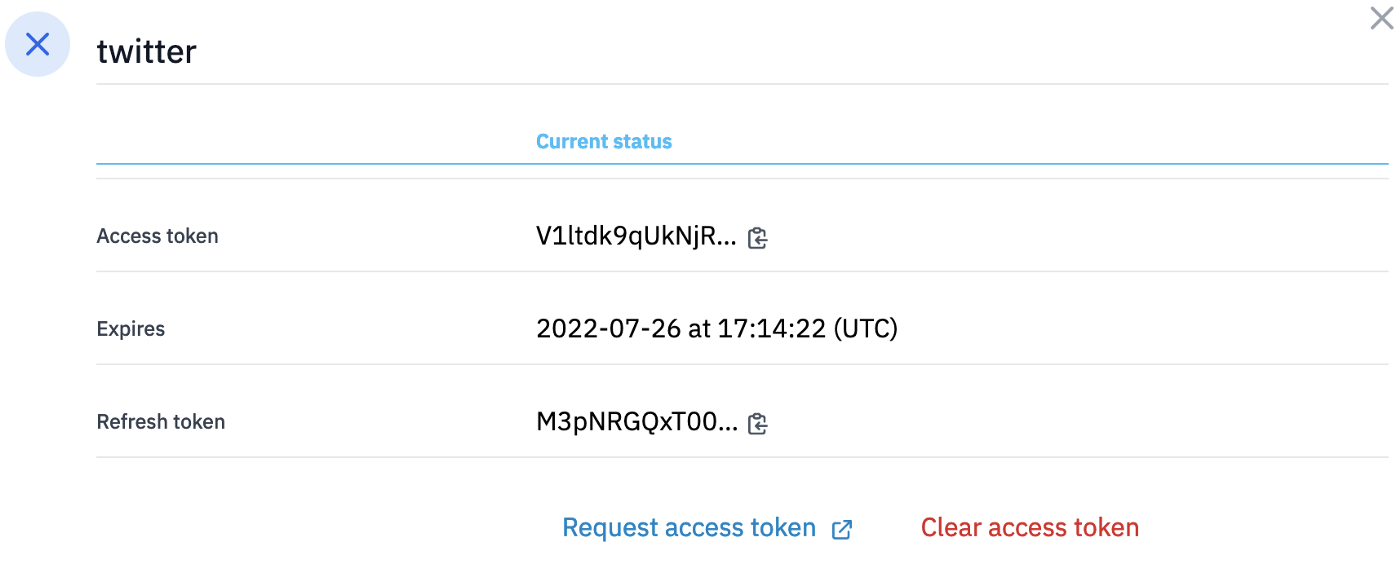
The "Request access token” button will take you to the OAuth2 authorization process to obtain an access token. The dialog will look like the one below when an access token is obtained.

You should always obtain an access token on the successful authorization. In this case, we also have a refresh token, which you likely want to have for an automated task. Hence, it is a good check to see if you get a refresh token. If not, you will not have access after the expiration date.
Using secrets in flows
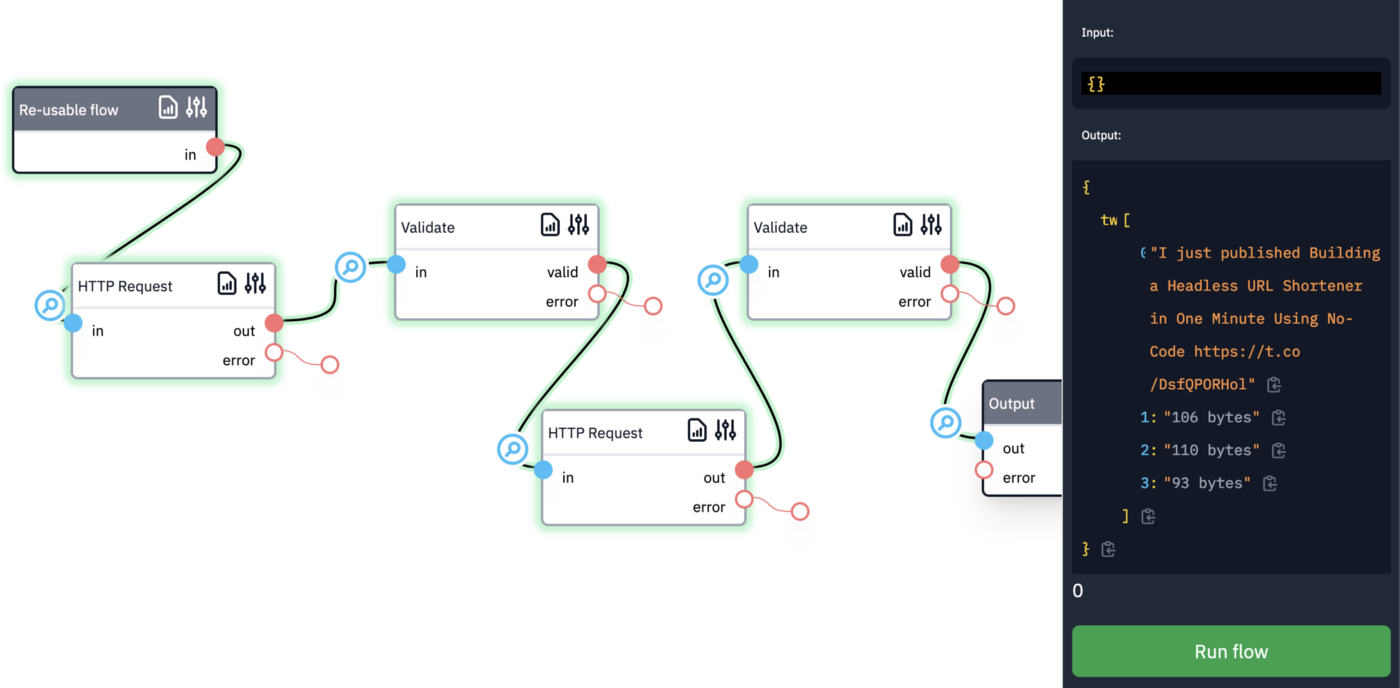
You can use the OAuth2 secret to authenticate an HTTP request. You'll notice an input called "secret” when providing input for this block. You must provide the name of the secret here, for example, "twitter”. That is everything you need to do here. Flowlet will take care of adding the correct Authorization header, using the OAuth2 access token and refresh token.

Many APIs have an endpoint to get information about the logged-in user. In Twitter, this has the path "/2/users/me”. APIs implementing OpenID always have such an endpoint, the userinfo endpoint in OpenID terminology. This is a way to get the user id, which we did not receive in the authorization flow. After that, we can use it to fetch the tweets by this user, for example.

Conclusion
By following the steps outlined in this article, you can securely connect any OAuth2 API with Flowlet. The Twitter example shows which details to look for in their documentation. The steps are similar for connecting other providers.
Can't wait to solve your API integration with Flowlet?
- Join the waitlist for the private beta
- Follow us on Medium, Twitter, or LinkedIn